Monday, 31 December 2012
Winter Memories - Project Class
December's Project Class used the Winter Memories stamp set - from the Autumn / Winter catalogue (page 19).
The class consists of 3 cards and a sweet little treat box made using the Fancy Favour Die (main catalogue - page 194).
Stamps : Winter Memories
Colours : Real Red, Early Espresso and Very Vanilla
Big Shot : Woodgrain Embossing Folder, Apothecary Accent Framelits
Ribbon : Early Espresso Scalloped Tulle, Victoria Crochet Trim
Other Products : Essentials Paper-Piercing Pack, Basic Rhinestones
Other Products : Mini Silver Brads, Basic Rhinestone
Labels:
Christmas,
Project Class,
Winter Memories
Saturday, 29 December 2012
Team Training Day - Final Project
This was the final project my lovely Team completed on the day. I encourage my Team to make their own Business Tools for use in their businesses. They are so useful when doing classes and parties because they can give our customers a much better idea of what our products look like and do - it can be difficult to do this just by looking at the pictures in the catalogues.
This tool showcases all the current standard Embossing Folders. There is a separate Top Note for each of them. This enables our customers to not only see in detail what the folders do - but touch and feel the effects too. They can also see the 'reverse' side!
The front cover and book ring are decorated with more of the Stitched Satin ribbon and some of the really sweet In Color Dahlias (page 175 main catty).
Have you been thinking about joining Stampin' Up!? Would you like to find out more about it and what's involved? Please don't hesitate to contact me if you would like to have a chat about it. Remember there is no pressure to sell or have parties if you don't want to :o) If you would just like to purchase the Starter Kit for it's incredible value - that's absolutely fine.
There is more information about joining Stampin' Up! under the 'Join My Team' Tab at the top of my blog.
I would love to have you in my Team of Dazzling Stampers and would welcome you at all my Training events.
My next all day Training is scheduled for Sunday 17th March. You are welcome to come along for the day before joining if you would like to - give me a ring to find out more :o)
Email Me Here! (teri.pocock@live.com)
Phone No : 01225 768107
Mobile : 07873 174983
Labels:
Business Tool,
Embossing Folders,
Team Training,
Top Note
Monday, 24 December 2012
Training Day - Another Project
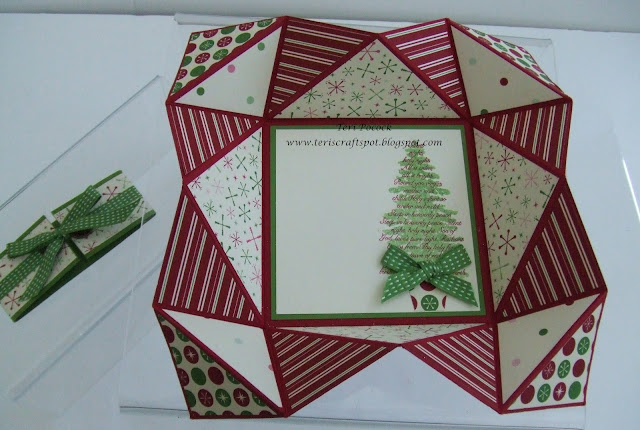
The above fancy fold card is called a Handkerchief fold :o) You can make these from any size square of cardstock. The above one uses a 8" x 8" square.
Again, it's a really quick and easy project when using the Simply Scored board and the Diagonal Plate - it takes less than a minute to score all these folds!
I used my favourite Christmas stamp set of this year again to stamp the centre panel - Evergreen. The 'block' tree was first stamped with Gumball Green ink - followed by the 'word' tree stamped in Cherry Cobbler ink. Finally the 'outline' tree was stamped in Versamark ink and then heat embossed with the new Iridescent Embossing Powder (page 159 main catty) - this gives it a beautiful subtle sparkle.
The papers used are from the Be Of Good Cheer DSP and the ribbon is Gumball Green Stitched Satin.
The belly band just slides off so you can open the card - although you can undo the ribbon if you want to. Two Antique Brads help to keep the ribbon secure at each end of the band :o)
Saturday, 22 December 2012
Training Projects - 2
This is the third project created for my team training day. The inspiration for this one came from Pinterest.
A simple tree decoration created using the Ornament Keepsakes stamp set and matching Framelits. The rosette is created using the Simply Scored board. They have all been finished off with a little of the Crumb Cake Tulle ribbon, some Champagne Glimmer paper and an Antique Brad.
We didn't make all three on the day, everyone got to choose which one they wanted to make :o)
Each ornament consists of 5 single stamped and die cut ornaments folded and glued together to make them 3 dimensional.
This next project isn't the actual one created on the day - my dogs managed to destroy the original when my back was turned! You can see the original one in the second photo on the previous post. This is one I demonstrated at my parties in November.
The little treat holder is created using the Fancy Favor die. It's very quick to make because the die does most of the work :o) The top layer of DSP pulls off to reveal the goodies inside.
To make this you cut a full Favor box from cardstock for the base. For the DSP part you cut another with the die, but omitting the bottom tabs.
Labels:
Fancy Favor Die,
Ornament Keepsakes,
Team Training
Tuesday, 18 December 2012
Team Training Day
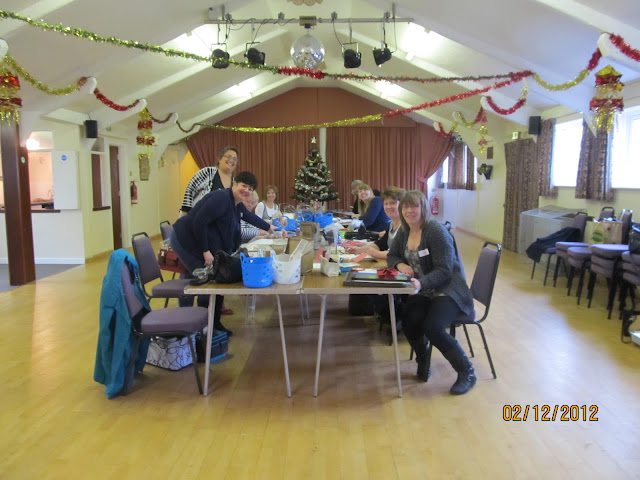
At the beginning of December I held my first all day training for my Team of Dazzling Stampers. It was a really lovely day with nine of the team attending.
These are the swaps everyone brought on the day - don't they look fab?
The day consisted of lots of crafting, a little business training and lots of getting to know each other! I have several distance team members now who live too far away to attend my monthly evening team meetings - so the day gave everyone the perfect opportunity to meet and get to know some of the rest of the team.
There were 6 projects to complete on the day......... here are the first two!
From the front left is Sandra with Kath stood up behind. Diane is just peeking through between them :o) At the back left is Caroline and opposite her we have Jane Brotherton, Emma, Jane Brown with Wendy right at the front.
Sue managed to hide on the first pic, but I got her on this one - working hard! :o)
These are the swaps everyone brought on the day - don't they look fab?
The day consisted of lots of crafting, a little business training and lots of getting to know each other! I have several distance team members now who live too far away to attend my monthly evening team meetings - so the day gave everyone the perfect opportunity to meet and get to know some of the rest of the team.
There were 6 projects to complete on the day......... here are the first two!
This simple, but beautiful card showcases a technique - Colouring Silver Glimmer paper.
There are several ways to do this, but the one we used on the day was to put drops of reinker onto a palette and then pick up the ink using a sponge dauber. The ink was then daubed all over the die cut snowflake. You can deepen the colours just by adding more ink. When you have finished, you need to dry the ink with a Heat Tool - be careful though because the Glimmer paper can melt and burn!
Colours : Primrose Petals, Lucky Limeade, Whisper White
Big Shot : Northern Flurry Embossing Folder, Snow Flurry Bigz Die
Other Products : Silver Glimmer Paper, Silver Brad
This little box contains 4 'Thank You' cards. It's really quick and simple to make using the Simply Scored board - and there is no gluing!
The box is held closed by a magnetic closure - although you could use a velcro one which would work equally as well.
Stamps : Field Flowers, Just Believe (sentiment)
Colours : Raspberry Ripple, Gumball Green, Whisper White
Ribbon : Gumball Green Stitched Satin
Other Products : Dazzling Diamonds Glitter, Magnetic Closure
I've made lots of these sets over the last few months - and they look great in all the colours!
Labels:
Field Flowers,
Snow Flurry.,
Team Training
Thursday, 13 December 2012
Evergreen - Project Class
For my November Project classes I used one of the Christmas Stamp Sets from the Autumn/Winter Catalogue. Evergreen (page 18) is one of my favourite sets from this year.
My inspiration came from the catalogue itself for this set. In the top left corner of the page is a beautiful picture frame - I followed the design to create the first card.
The papers used are the equally gorgeous Candlelight Christmas Speciality DSP (page 4). You get 10 12"x12" double sided papers in this pack together with 2 12"x12" sheets of beautiful Flocked Window Sheet. I used the Flocked Window Sheet for the window in the lid of the box.
The colour combination used for this project was Cherry Cobbler, Early Espresso and Very Vanilla - although there are touches of Naturals Ivory too.
I also used the Champagne Glimmer paper (page 5).
If you would like to purchase the instructions for this set, you will find the details below. The instructions will be emailed to you within 48 hours ....
Evergreen - Class Instructions - £3.00
Tuesday, 11 December 2012
Betsy's Blossoms - Project Class
My October Project Classes used the lovely Betsy's Blossoms stamp set - page 72 in the main Catalogue.
The class consists of 3 co-ordinating cards and envelopes and a box to hold them all.
The papers used are the beautiful Floral District DSP which matches the stamp set perfectly!
If you would like to purchase the instructions for this set, you will find the details below. The instructions will be emailed to you as a PDF document within 48 hours ....
Betsy's Blossoms - Class Instructions - £3.00
Monday, 3 December 2012
The New Stampin' Trimmer Is Now Available!!!
The New Stampin' Trimmer is now available! I can't wait to get my hands on it, it looks FABULOUS!
You can find all the details on page 180 in the main catalogue - or have a look at this video to see the main features.
The price is £25.95 and the Trimmer comes with both a cutting and a scoring blade. The item code is 129722.
Replacement cutting blades and scoring blades will be available shortly.
Note : Our Trimmer will have both inches and cms on it! :o)
Contact me to order yours today!
Labels:
Product,
Stampin' Trimmer,
Tools
Subscribe to:
Posts (Atom)